

YouTube
0:00 About Servo Motors
0:51 What we will make this time
0:58 Preparation of materials to be used
1:03 Schematic
1:27 Assembling the circuit
1:55 Programming
4:07 Write on the Board
4:30 Summary.
7. Servo motor


In this lesson, you will learn to use servo motors to
- Repetition syntax: for
- Reading the library
- Serial monitor (graph)
In particular, be sure to keep the for statement in mind, as it is a highly versatile program that will always appear in whatever you do.
Codes used
This is the code used in the video. Please feel free to use it.
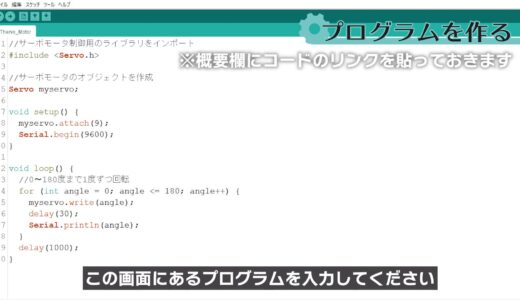
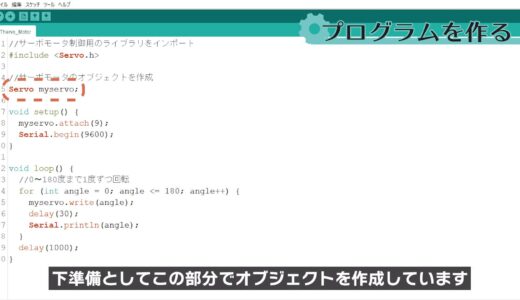
//Import library for servo motor control #include// Create a servo motor object Servo myservo;. void setup() { myservo.attach(9); Serial.begin(9600); } void loop() { //Rotate by 1 degree from 0 to 180 degrees for (int angle = 0; angle <= 180; angle++) { myservo.write(angle); delay(30); Serial.println(angle); } delay(1000); }
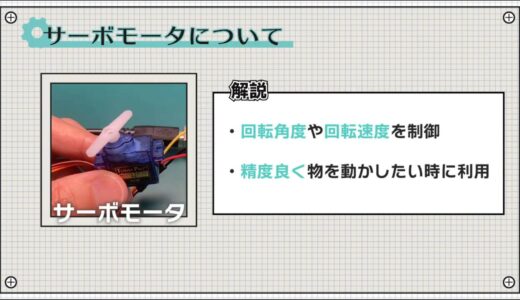
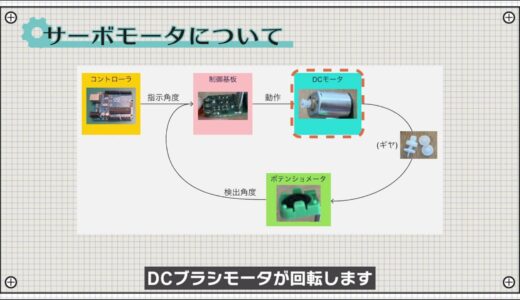
About Servo Motors
Servo motors are motors that can control the angle of rotation and speed, and are widely used when you want to move an object precisely within a certain angular range, such as joints in a robot or the opening and closing of a railroad crossing.
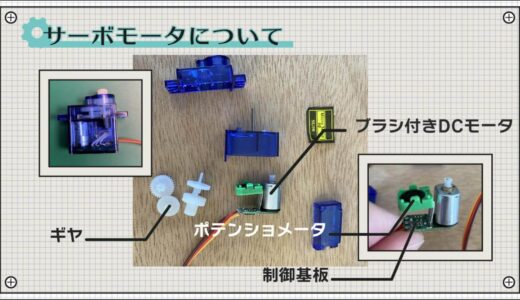
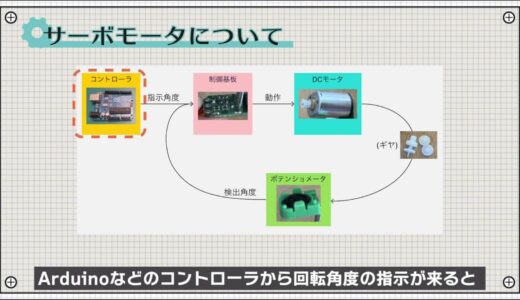
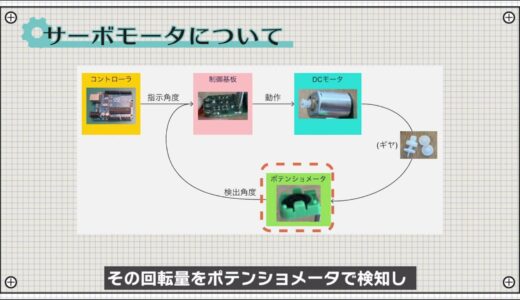
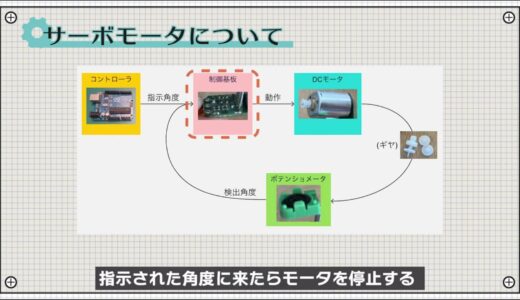
As shown below, the structure consists of an ordinary brushed DC motor, some gears, a control board, and a potentiometer that detects the amount of rotation.
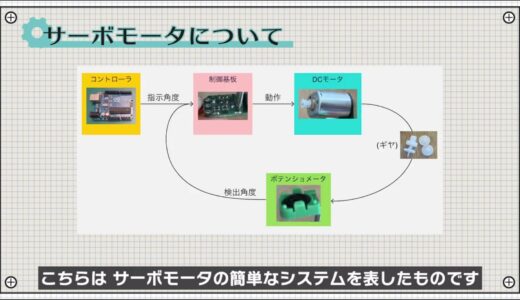
When the rotation angle instruction comes from a controller such as Arduino, the DC brush motor rotates.
 |
 |
The amount of rotation is detected by a potentiometer, and the motor is stopped when it reaches the indicated angle.
 |
 |
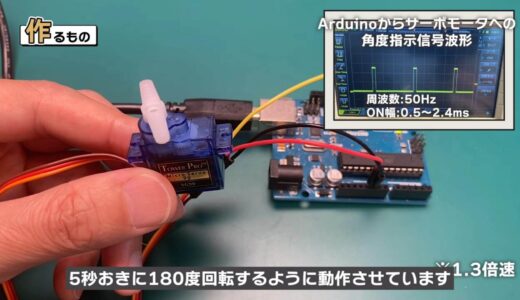
What we will make this time
The following image shows the circuit we created this time, which operates to rotate 180 degrees every 5 seconds.
Now let’s make this circuit.
Preparation of materials to be used
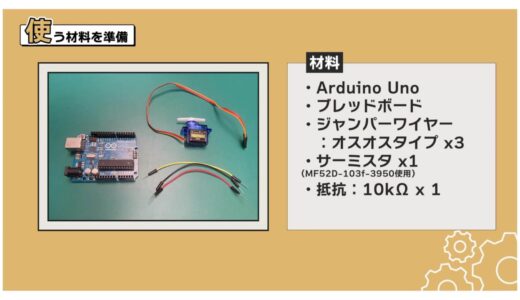
The following image shows the schematic to be created for this project.
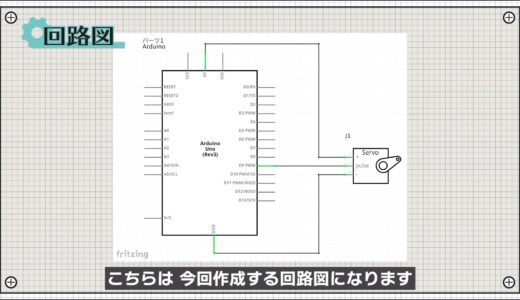
Power for the servo motor is supplied from the 5V output terminal of the Arduino.
schematic
Next, following the schematic, the breadboard diagram is shown below.
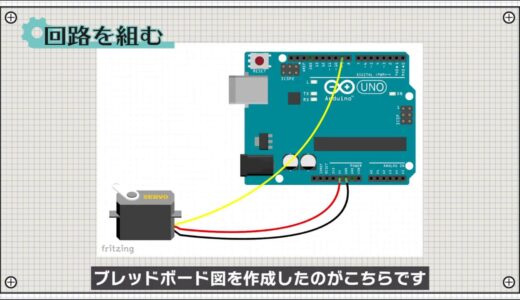
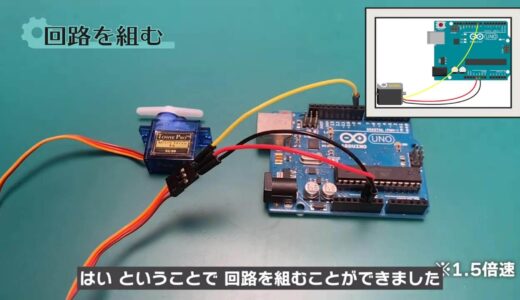
Most servo motors, including the type used in this project, have three wires: orange, red, and brown.

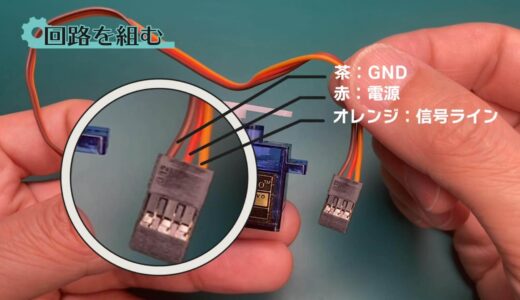
construct a circuit
Here is a circuit I built according to this diagram.
Programming
Now we will proceed with the coding.
Start the Arduino IDE, click File→New File, and enter the program on this screen.
Here we start with the first line of code called “ include” code.and imports a library for servo motor control called Servo.h.

Arduino comes with several libraries by default, including this Servo.h.
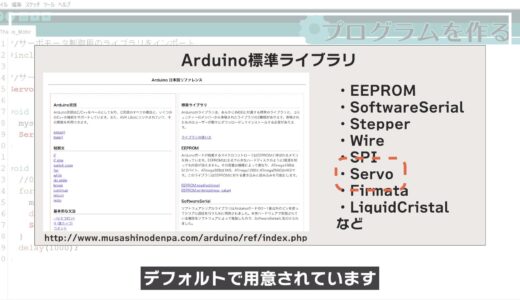
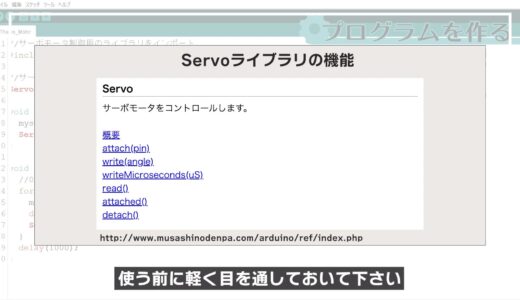
The servo.h used in this project has the following six functions, so please take a quick look at them before use.
Then, in order to be able to use the library read out, an object is created in the following part as a preliminary step.
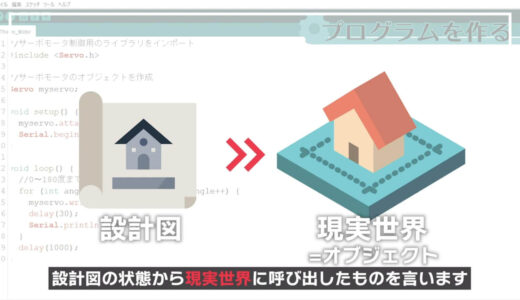
An object is a bit difficult to conceptualize, but it is something that is called out from its blueprint state into the real world in order to actually be able to use its function.
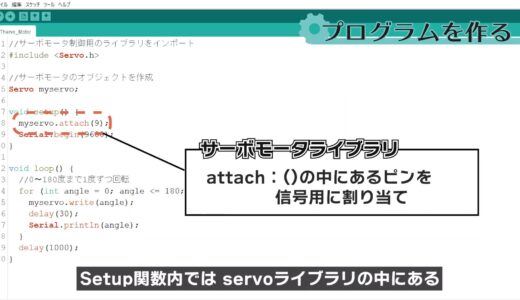
In the Setup function, the function attach in the servo library is used to assign pin 9 to a pin for a signal.
Also, this time, to monitor values using a function called serial plotter, the Serial.begin function is used as well as the serial monitor function.

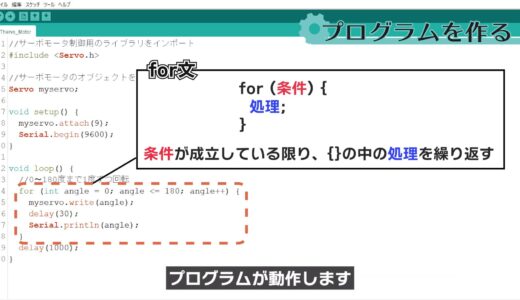
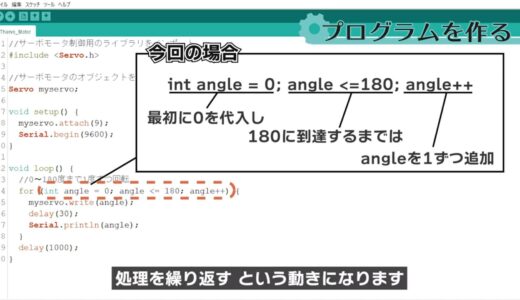
Next, within the loop function, a process is written that repeats itself using a for statement.
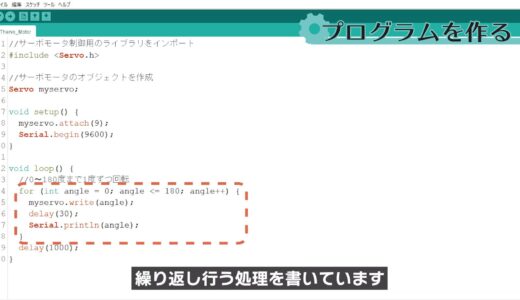
In a for statement, the program works in such a way that the portion enclosed within the braces is repeated as long as the condition in {} is satisfied.
{Inside {} are three sections: initialization process, conditional expressions, and increments.
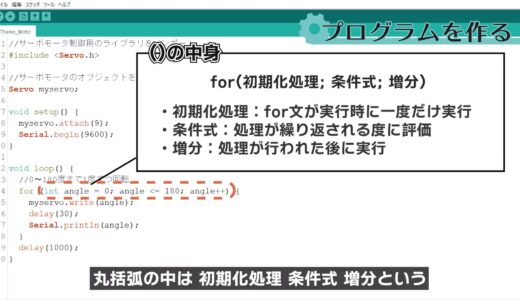
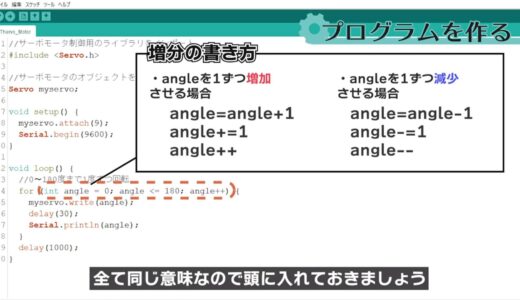
In this case, the variable angle, which represents the angle of rotation of the servo motor, is first assigned 0, and the process is repeated, adding 1 at a time, until 180 is reached.
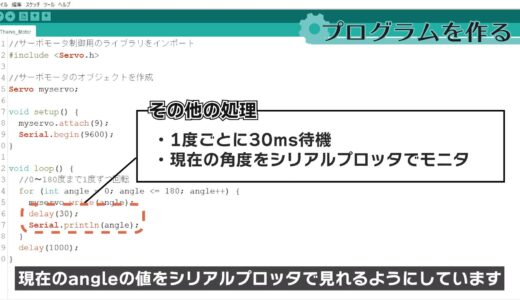
And in that part of the process, the function “write” in the servo library is used to rotate the angle to be the angle of each ANGLE.

It then waits for a period of 30 ms and also allows the current value of angle to be viewed on a serial plotter.
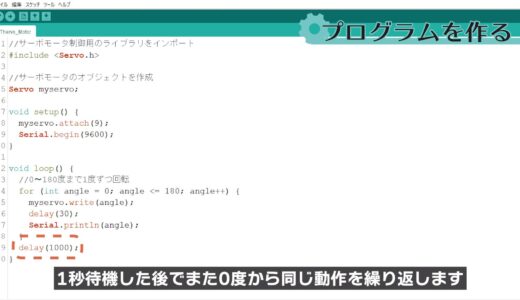
This simply means rotating from 0 to 180 degrees in 1 degree increments.
After rotating to 180 degrees, wait 1 second and repeat the same operation from 0 degrees again.
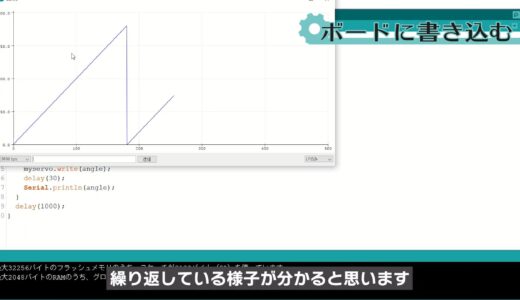
Write on board
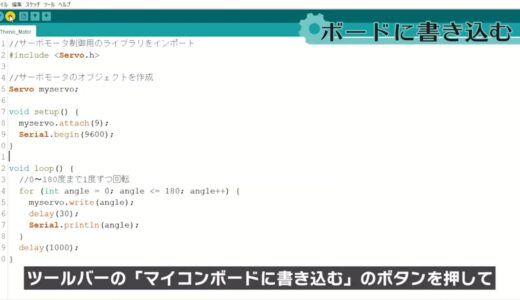
Finally, save the file and press the “Write to microcontroller board” button on the toolbar to write the file.

Also, if you start the serial plotter from the tool on the menu bar, you will see that it gradually increases from 0 to 180, and when it reaches 180, it starts from 0 again, as shown in the following image.
summary
So this is what we have learned in this issue.
- Repeated syntax; for
- Reading the library
- Serial monitor (graph)
On this site, we post videos and articles that allow you to learn electronics construction systematically from zero, including explanations of the minimum knowledge and tools you need to acquire.

\電子工作歴9年の私のイチ押し!ELEGOOの電子工作キット/