YouTube
0:00 Opening
0:54 Tips and notes on placement
2:51 Wiring tips and cautions
5:04 One Point Advice
5:23 Summary
Tips and cautions for using breadboards
I’d like to know if there are any wiring tips.


In this article, I will explain some tips and cautions when using a breadboard for those who are just starting out in electronic construction.
If you keep the tips and cautions introduced here in mind, you will be able to cover the biggest drawback of breadboards, which is their low reliability, and you will also be able to use them safely without making mistakes.
When you finish reading this article, you will be able to use the breadboard right now.
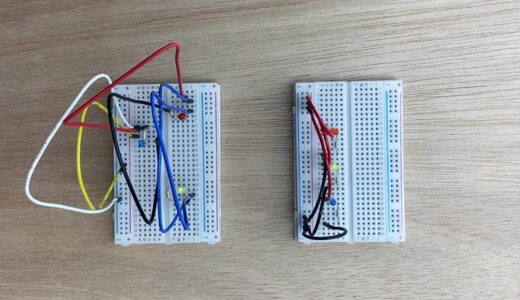
How to assemble a breadboard [good and bad examples].
We will use the two breadboards in the figure below to illustrate good and bad examples.
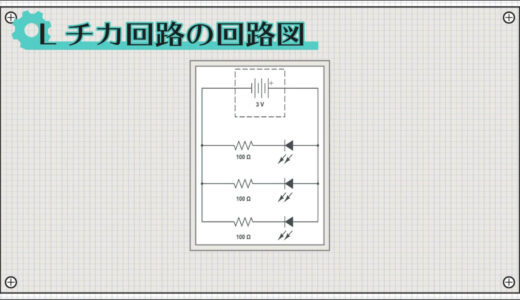
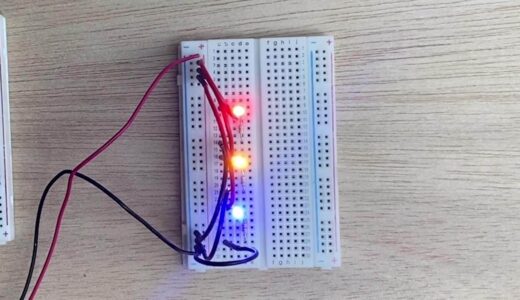
The following diagram shows three circuits for lighting LEDs in a row.
The two breadboards mentioned earlier look completely different, but both have the same LEDs, as shown in the following image.
But to conclude first, the right side of the figure below is a “good example” and the left side is a “bad example.
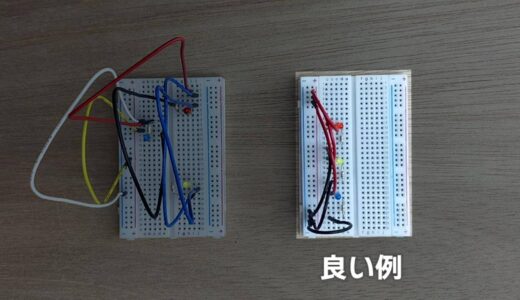
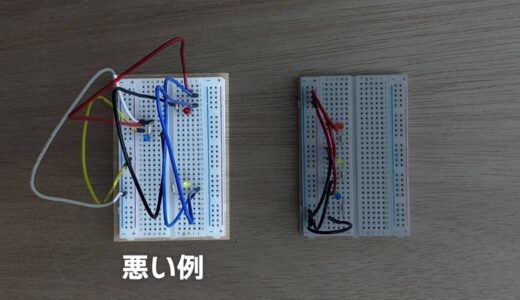
We will explain the reasons for this and five tips for successful assembly.
Two of these will be “placement tips” and the other three will be “wiring tips.
First, we will discuss some tips and cautions regarding placement.
Tips and notes on placement
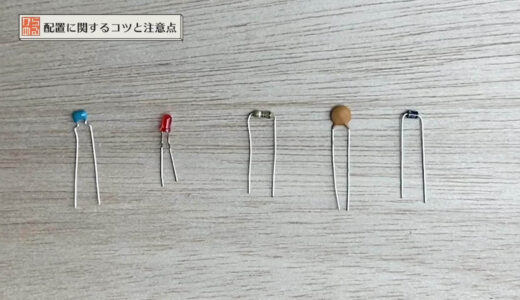
1): Cut the legs of the parts short.
The first tip regarding placement is to “cut the legs of the parts short.
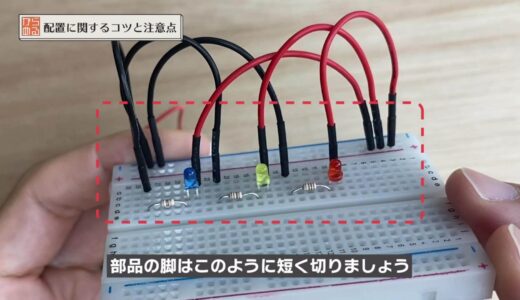
The condition of newly purchased electronic components is often long-legged, as shown in the following image.
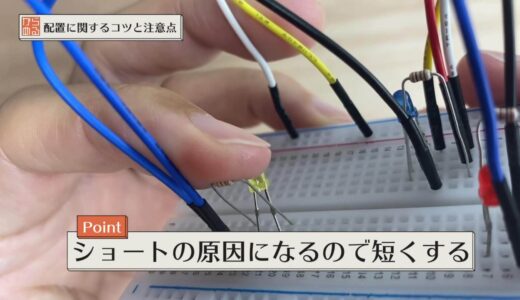
If the legs are used as long as they are, there is a risk that the legs will come into contact with each other and short-circuit when the component tilts as shown in the following image.
Therefore, the legs of the parts should be cut short.
(2): Arrange them in the image of a schematic diagram.
The second tip regarding placement is to “arrange them with the schematic in mind.
The following figure shows the circuit diagram created for this project, with three LED lighting circuits in a row.
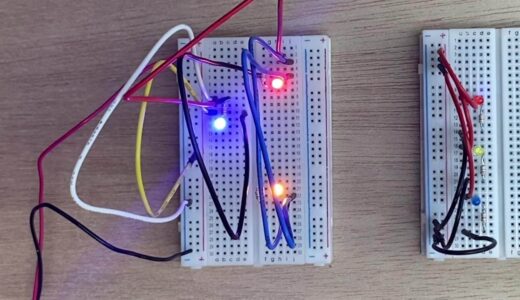
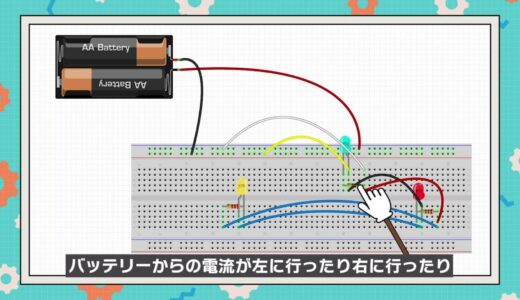
Let’s look at the following diagram to see a bad example of this schematic assembled on a breadboard.
You can see that the current from the battery is going to the left and to the right, and back and forth between the left and right many times.
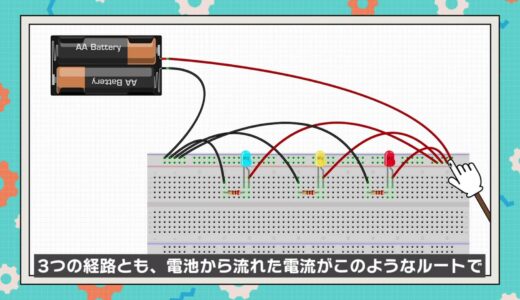
In the good example, on the other hand, you can see that the current flowing from the battery is going straight from right to left in all three paths, just as in the circuit diagram.
When a circuit does not work correctly, we usually look at the schematic and squash the suspicious parts.
At such times, it is very easy to understand if the circuit diagram is lined up with an image of the circuit diagram, because the circuit diagram and the breadboard circuit are in close proximity, making it easy to check and verify the circuit.
These are the two “placement tips.
Next, we will discuss three “wiring tips”.
Wiring tips and cautions
1): Unify the thought of wiring color.
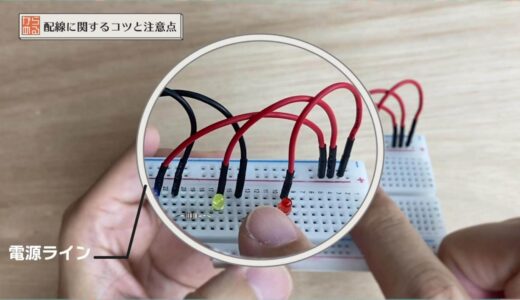
The first tip regarding wiring is to unify the color philosophy of the wiring.
This is obvious if you compare the two, and in the bad example, the colors have been chosen appropriately, so it is not at all clear where the power lines are.
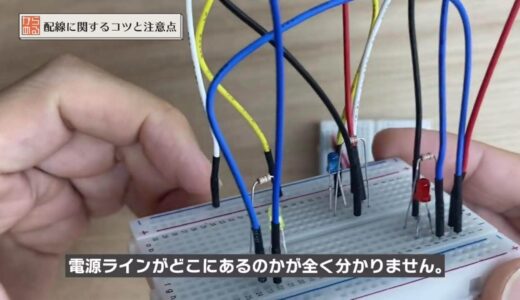
On the other hand, in a good example, the power line is determined to be red, so you can identify the power line wiring in one shot.
In the figure below, the thought is written for a six-color line as an example.
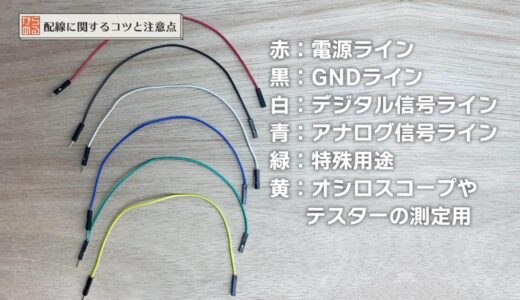
Of course, everyone has his or her own preferences, so the division is up to each person, but the important thing is to keep the rules once you have set them.
I recommend that you try to make your own rules once.
2): Keep wiring as short as possible.
The second tip regarding wiring is to keep wires as short as possible.
As you can see in the figure below, in the bad example, the wiring is quite long and messy.
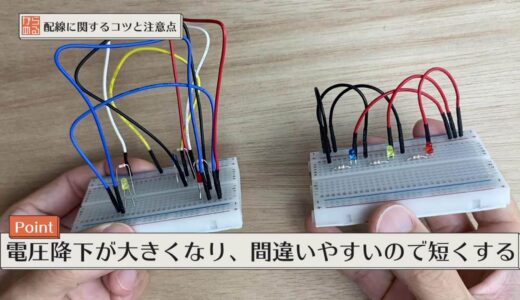
Longer wires have the disadvantage of increasing the voltage drop when current is applied and making it easier to make a wiring mistake.
In other words, even if the root of the current flow is 5V, the destination of the current flow may actually be only 4V.
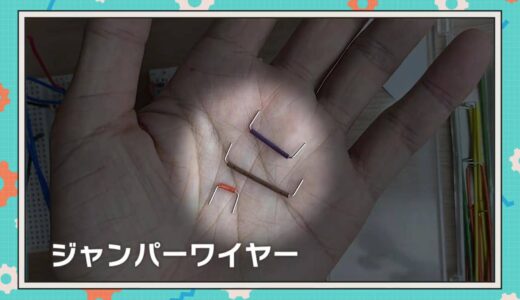
In that sense, using a shorter length of wire, called “jumper wire” as shown in the following image, is one option.
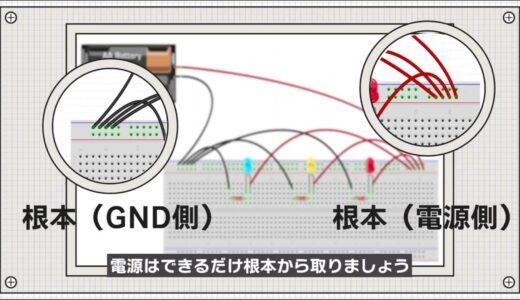
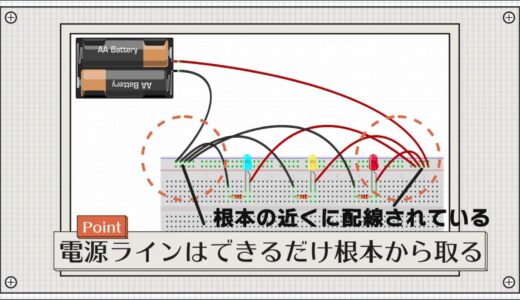
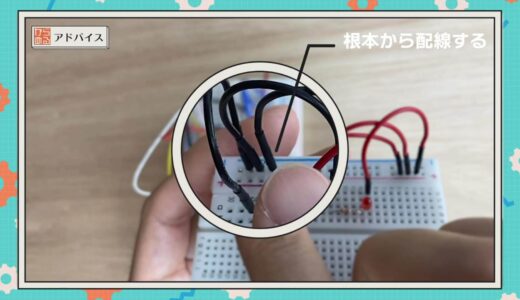
3): Power is taken from the root.
Finally, the third tip regarding wiring is to “get power from the root as much as possible.
As I have shown in another article, breadboards are connected internally by metal pins.
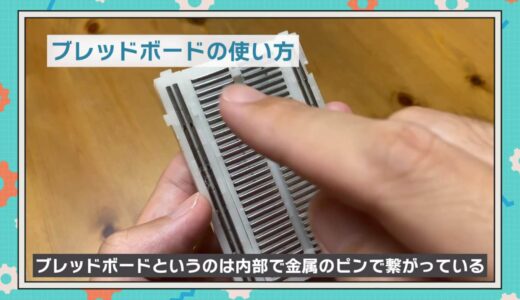
Similar to the wiring discussed earlier, this pin has a non-zero resistance value, so a voltage drop always occurs when current flows through this pin as well.
However, unlike wiring, the length of a pin cannot be changed, so wiring far from the root is not possible.
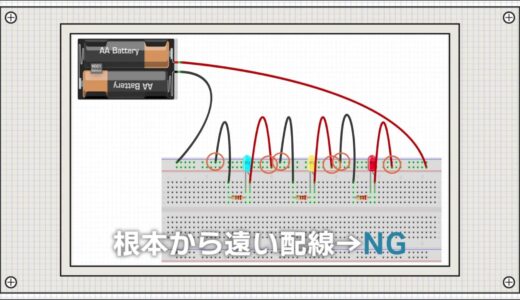
The only option to lower the resistance is to get as close as possible to the root of the power supply.
When assembling a breadboard, try to keep the five perspectives listed here in mind when placing and wiring.
(1) Cut the legs of the parts short.
(2) Imagine a circuit diagram and arrange it
(iii) Unify the color philosophy of wiring.
(4) Keep wiring as short as possible.
(5) Power supply is taken from the root
advice of a point (advice that may be helpful to some people)
One last piece of advice.
All current flowing out of the power supply returns to the GND side, so the only difference between the power supply and the GND is the direction of the current.
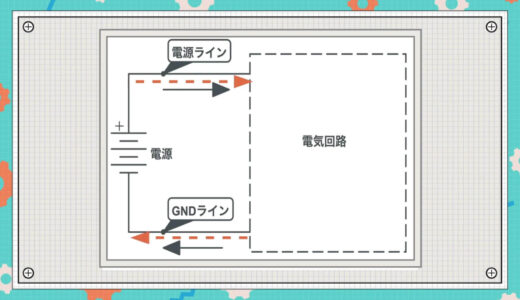
So for the GND line, the point that it should be wired from the root as shown in the following image is exactly the same.
summary
In this issue, we have explained five tips and cautions for those who want to get more out of their breadboards.
Since there is no correct way to assemble the system, we do not intend to tell you that you must follow this method.
However, if you build your circuits with the things introduced here in mind, you will be able to dramatically increase the reliability of your breadboard and improve your own level of performance.
Please also refer to the “How to Select” and other information!
\電子工作歴9年の私のイチ押し!ELEGOOの電子工作キット/