

YouTube
0:00 About thermistors and analog inputs
0:53 What we will make this time
1:01 Preparation of materials to be used
1:19 Schematic
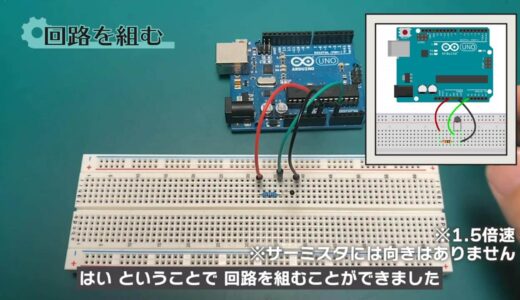
2:10 Assembling the circuit
2:22 Programming
3:41 Write on the Board
4:00 Summary.
Codes used
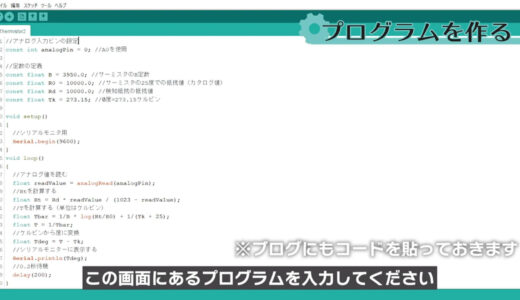
This is the code used in the video. Please feel free to use it.
//アナログ入力ピンの設定
const int analogPin = 0; //A0を使用
//定数の定義
const float B = 3950.0; //サーミスタのB定数
const float R0 = 10000.0; //サーミスタの25度での抵抗値(カタログ値)
const float Rd = 10000.0; //検知抵抗の抵抗値
const float Tk = 273.15; //0度=273.15ケルビン
void setup()
{
//シリアルモニタ用
Serial.begin(9600);
}
void loop()
{
//アナログ値を読む
float readValue = analogRead(analogPin);
//Rtを計算する
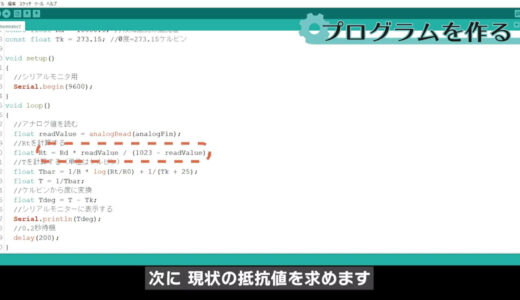
float Rt = Rd * readValue / (1023 - readValue);
//Tを計算する(単位はケルビン)
float Tbar = 1/B * log(Rt/R0) + 1/(Tk + 25);
float T = 1/Tbar;
//ケルビンから度に変換
float Tdeg = T - Tk;
//シリアルモニターに表示する
Serial.println(Tdeg);
//0.2秒待機
delay(200);
}
6. Thermistor


- analog Read function
- basic arithmetic operations
- Data type: float
- How to use the data monitor
Here we will use the thermistor to learn about the analogRead function, the four arithmetic operations, and the data type float.
About Thermistors and Analog Inputs
A thermistor is a type of temperature sensor that has the characteristic of changing resistance when the temperature changes.
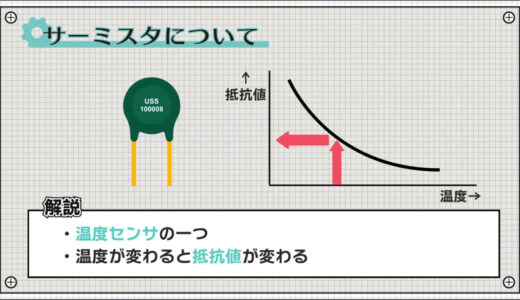
By using this characteristic in reverse, temperature can be measured from the change in resistance.
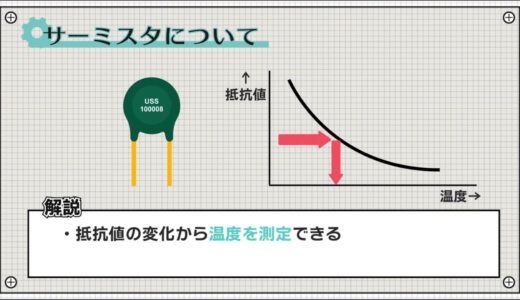
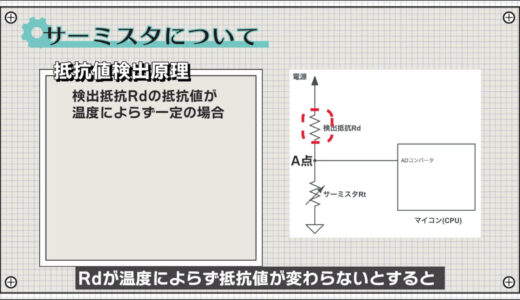
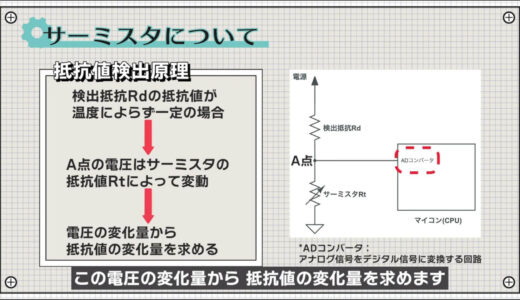
However, it is difficult to measure resistance directly, so it is generally read by converting it to voltage by setting up a circuit like the following.
 |
 |
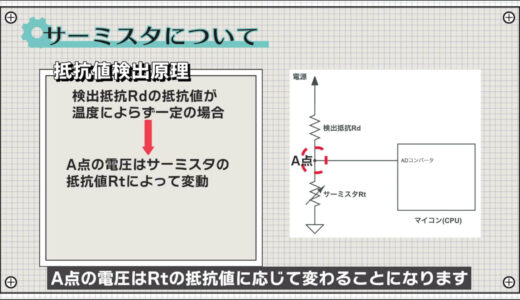
The detection resistor Rd is a general resistance, and if Rd does not change its resistance value regardless of temperature, the voltage at point A will vary with the resistance value of Rt.
 |
 |
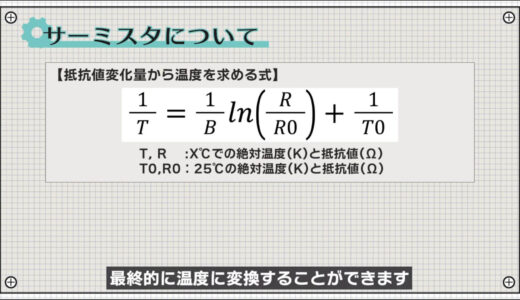
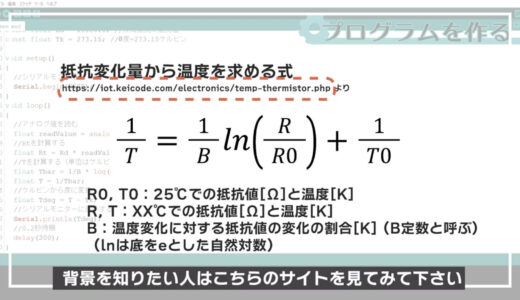
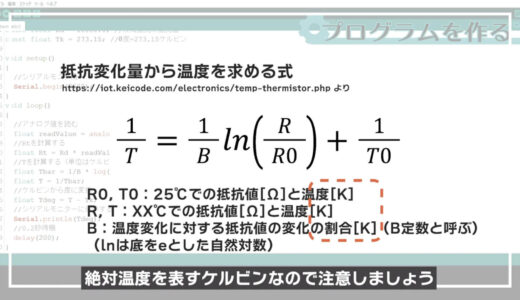
The following equation can then be used to convert it to the final temperature.
The B constant is a constant that indicates the characteristics of the thermistor and shows the slope of how much the resistance value changes in response to changes in temperature.
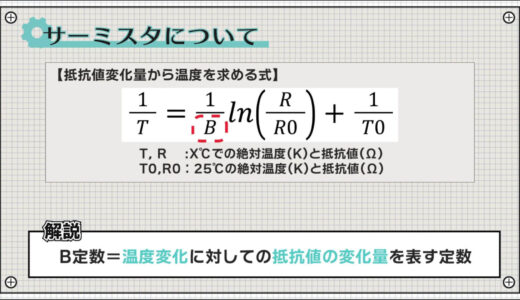
In most cases, the value is found in the thermistor’s data sheet, so use that value.

What we will make this time
This is the circuit we created this time, and you can see that the temperature changes when you touch it like this or turn up the heat with a hair dryer.
Preparation of materials to be used
The materials used for this project are an Arduino Uno, a breadboard, three male and three female jumper wires, a thermistor, and a 10kΩ resistor.
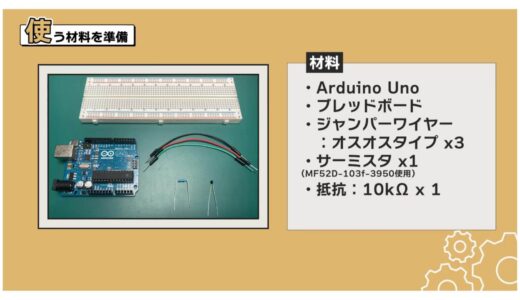
There are two types of thermistors: the NTC type , whose resistance decreases as heat increases, and the PTC type , whose resistance increases.


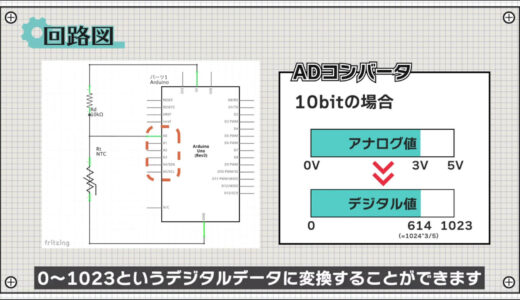
schematic
The following figure shows the circuit diagram to be created for this project.

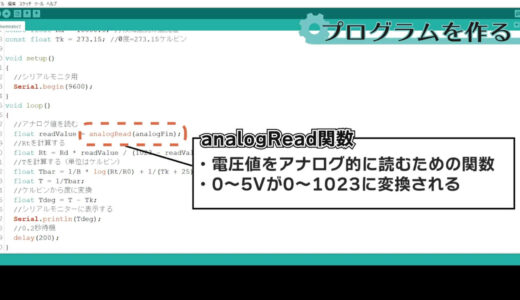
The analog input terminal of the Arduino has a 10-bit AD converter that can convert analog-like voltages in the range of 0 to 5 V into digital data in the range of 0 to 1023.
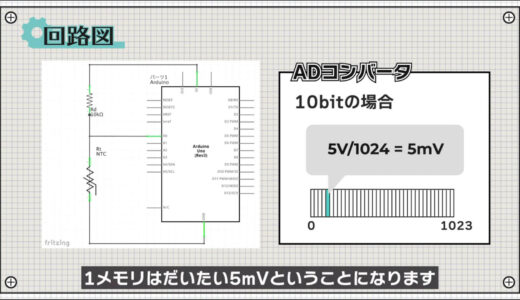
The voltage per memory is called the resolution, and in this case, 5V is divided by 1024, so one memory is roughly 5mV.
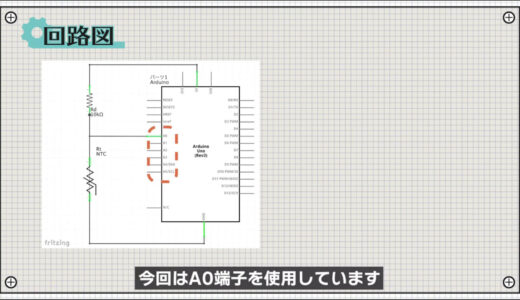
There are a total of six analog input terminals, and the A0 terminal is used in this case.
If Rd is too small or too large, the voltage at point A will swing very little, making it difficult to accurately calculate the resistance.
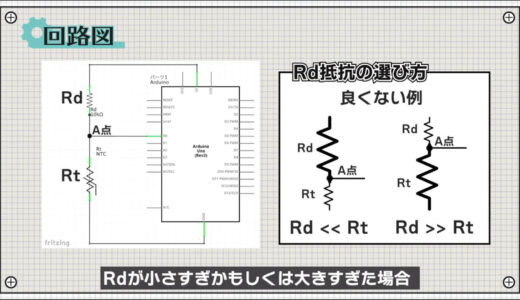 |
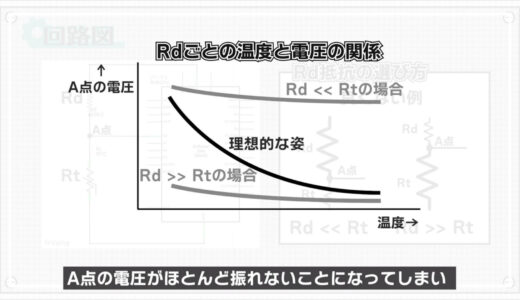 |
In reality, fine adjustments are necessary depending on the temperature range you wish to measure, but for the time being, I think it is best to use a value equivalent to the resistance of the thermistor at room temperature.

In the case of this thermistor, since it is 10kΩ, Rd is also 10kΩ.

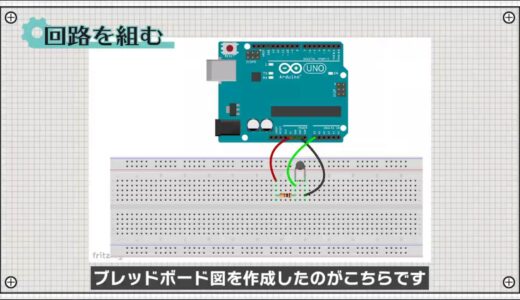
construct a circuit
The breadboard diagram below follows the schematic diagram.
Programming
Now we will proceed with the coding.

Start the Arduino IDE, click “File→New File” and enter the program shown on this screen.
Lines 5-8 are constants used to calculate resistance.

In this case, since a decimal point is generated by using division, etc., a data type called float is used, which can handle a decimal point.

This is a function that allows the Arduino and PC to exchange data via serial communication, allowing you to verify operation while viewing values in real time.

This function can be used by using the function Serial.begin in the setup function.

In the loop function, the analogRead function first reads the voltage value.
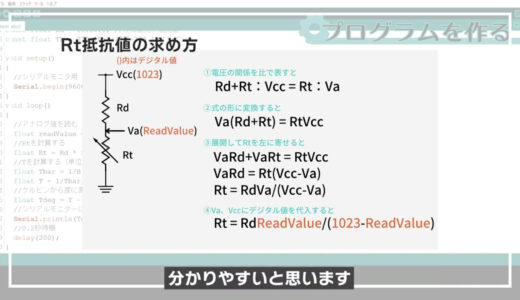
Next, determine the current resistance.
The idea of the formula is easy to understand when you think in terms of ratios like this.
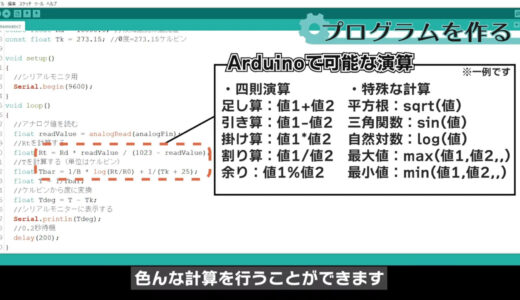
The Arduino can perform a variety of calculations, from general calculations called four arithmetic operations to slightly more complex ones such as log and root.
Next, use the formula written here to find T.
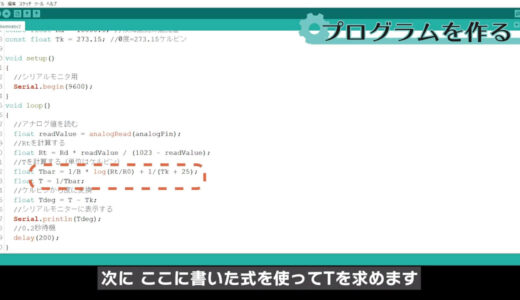
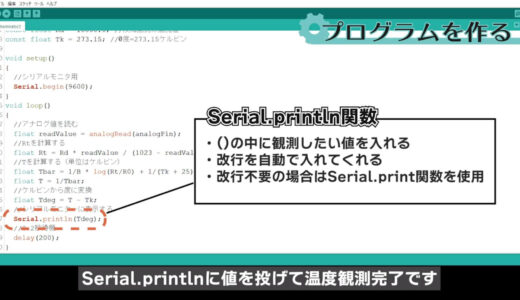
Note that the unit of measurement at this point is Kelvin, which represents absolute temperature.
Finally, after converting to Celsius, throw the value to Serial.println to complete the temperature observation.
Write on board
Finally, save the file and press the “Write to microcontroller board” button on the toolbar to write the file.
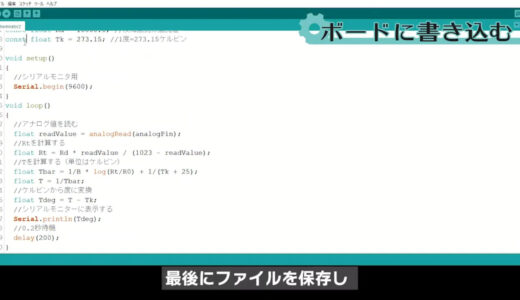
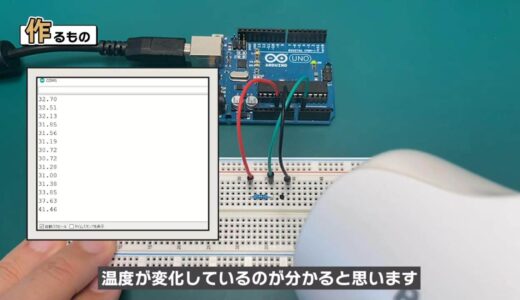
When writing is complete, press the “Serial Monitor” button in the upper right corner.

Thus, the value would be updated every 0.2 seconds.

First, measure the room temperature to see if the calculation is correct, and see if it roughly matches your senses.
summary
So this is what we have learned in this issue.
- analog Read function
- basic arithmetic operations
- Data type: float
- How to use the data monitor
On this site, we post videos and articles that allow you to learn electronics construction systematically from zero, including explanations of the minimum knowledge and tools you need to acquire.

\電子工作歴9年の私のイチ押し!ELEGOOの電子工作キット/