Good evening, this is Bono.
I recently had a child, so I tried to do something with Raspberry Pi since I was so excited.
I decided to create a monitoring system after hearing my wife say that she was too lazy to take out the trash alone because she didn't know when her child would cry, or that she was worried about not being able to see her child's expression while driving with the child in the baby seat in the backseat.
Memorandum of that time.
コンテンツ
finished product
Something like this will be produced.
The image is as if Buri Buri Zaemon is watching over you.
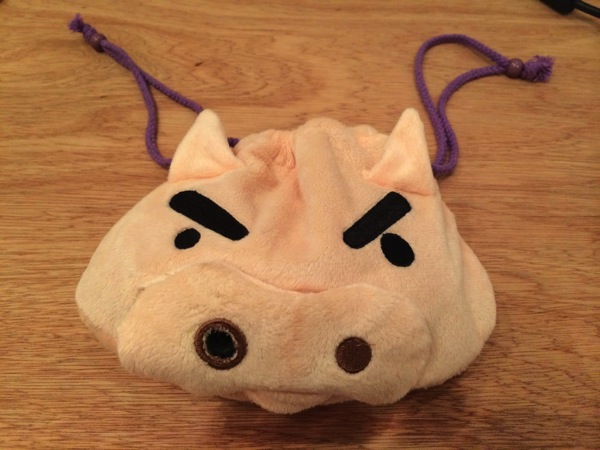
Contents.
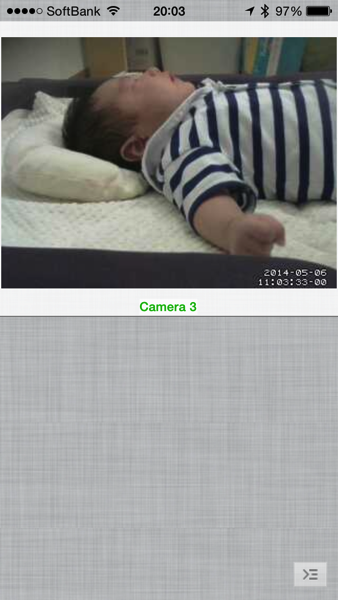
Actual use. iPhone application screen.
Functions & Specifications
- See your baby's face from any device in your network (PC, smartphone)
- Launch the application and view the camera image
- Images are automatically updated every second
- Resolution enough to see the baby's expression
- Use the network within PocketWifi
way of making
What to prepare
For this method, we have prepared the following 9 items.
Even if you buy them all, they cost less than 10,000 yen!
- PocketWifi: Using EMOBILE GL06P, which I usually use.
- Raspberry Pi: typeB was used
- SD card: Transcend TS16GSDHC10E 16GB. Actually not that big.
- WiFi dongle: BUFFALO WLI-UC-GNM
- Webcam: Logitech C270
- Battery: EMOBILE GL09P, used in the past, is used here as a power source.
- Monitor: Here we have our old iPhone 3, as long as it has WiFi communication capability.
- Doll or drawstring bag: Large enough to hold the above. In this case, Buri Buri Zaemon is used.
- Heat sink: for cooling Raspberry Pi.
Step 1: Install OS + camera software on Raspberry Pi
OS Installation
Refer to the past blog [Hardware] Summary from buying a Raspberry Pi to SSH connection to a PC in the network to install the OS and configure the network settings.
motion installation
The above settings are only to enable the network to be used.
This time, in addition, it is necessary to install "motion," the software for using the camera.
Installed according to the following site.
A very beginner tries to live-stream with a webcam using Linux motion
Step 2: Network Setup
PocketWifi Settings
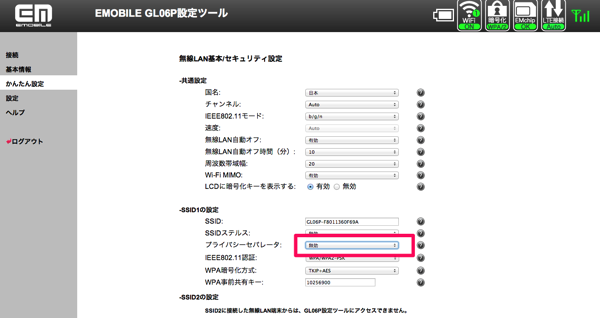
This stuck pretty well: when using PocketWifi to form a network, it doesn't work because the privacy permission setting is turned on by default.
This setting needs to be turned off.
Open your browser and go to http://192.168.13.1/にアクセス
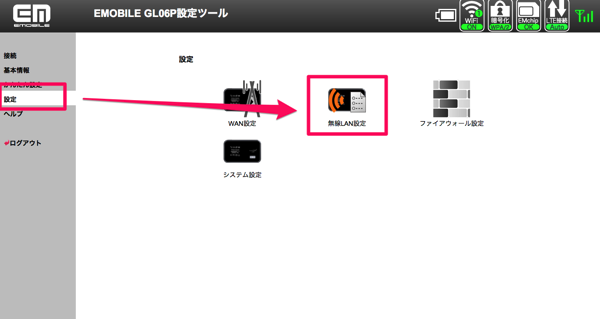
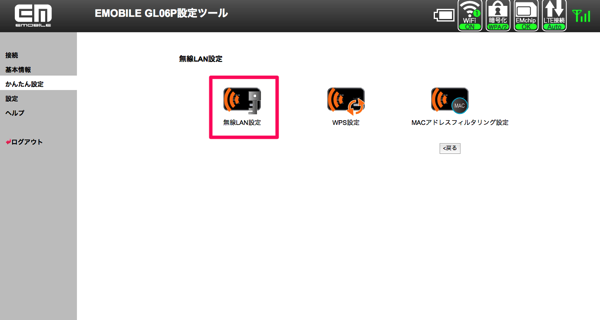
Click on Wireless LAN Settings
Privacy separator set to disabled
Step 3: Prepare the package
Processing drawstring bag
This could be anything, but since my son is a poo-pooer, I chose a character from the Crayon Shin-chan series, Buri Buri Zaemon, to add a bit of style.
The size looks about right too. 300 ml capacity?
To do this, cut out the left side of the nose and the bottom of the bag inside.
Pass the webcam through the left side of the nose and the USB portion through the inside bag.
The camera fits nicely into the nose area, so there is no need for tape or other fixing material.
As scheduled!
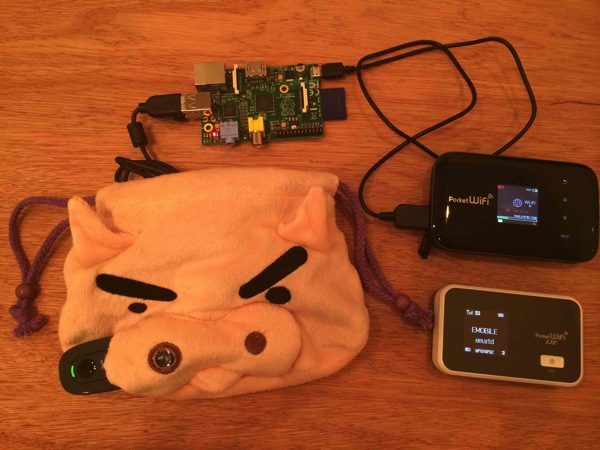
Packaging in drawstring bag
As a power source, I used PocketWifi GL09P, which is no longer in use.
Of course, it comes in a drawstring bag.
Furthermore, because of the space available, we also included a PocketWifi GL06P.
Step 4: Install the monitoring application on your iPhone
Images on the webcam can be viewed with a browser or webcam application.
One thing to note here is that it can be seen/not seen depending on the browser; it was not possible in Chrome.
Rumor has it that IE is not working either, Safari is OK.
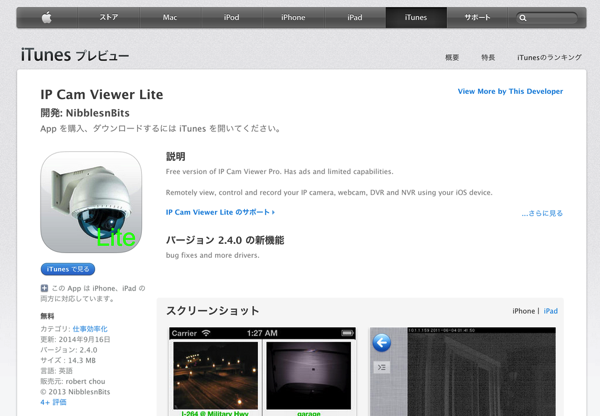
In the end, we installed IP CAM Viewer Lite, a free webcam application that was highly rated.
IP Cam Viewer Lite for iPhone, iPod touch and iPad available on the iTunes App Store
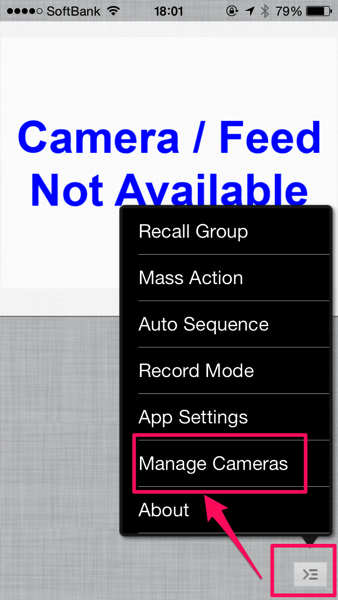
First, launch the software and select "Manage Cameras" from the settings button in the lower right corner.
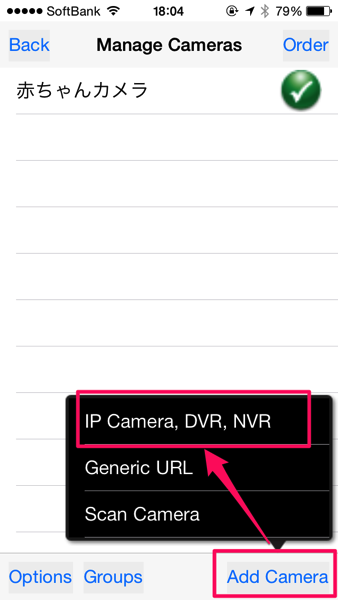
Next, select "IP Camera, DVR, NVR" from "Add Camera" in the lower right corner.
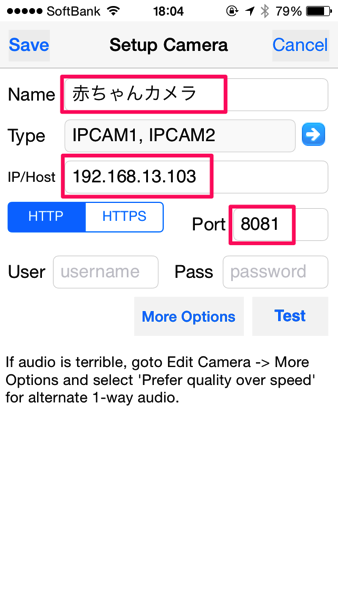
Enter the baby camera ( any name here) in "Name", the IP address of the Raspberry Pi in "IP/Host" , and8081 in "Port".
If the setup is successful, the webcam image is projected.
precautions
Beware of heat!
The RaspberryPi seems to heat up considerably when acquiring images at regular intervals as in this case.
Maybe that's why I ruined one RaspberryPi.
The green LED, which should be blinking, does not even light up when power is turned on. Unfortunate.
I looked for a heat-dissipating gel, a heat-dissipating sheet, or a heat sink as a heat countermeasure, and to my surprise, I found that there is a heat sink for RaspberryPi.
I'll buy it right away.
I haven't monitored the temperature, but it looks pretty good.
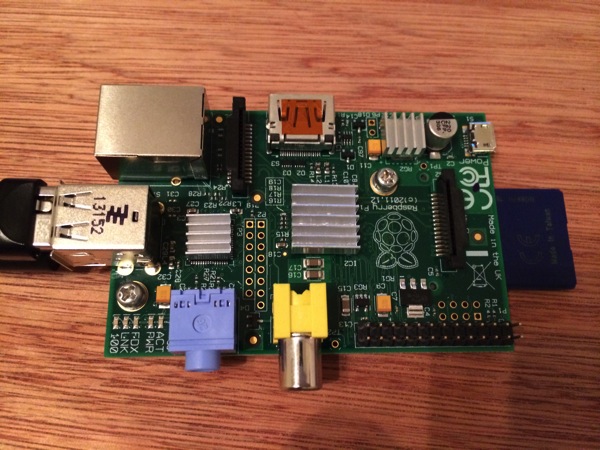
Note the voice feature of IP CAM Viewer Lite!
In this article, I have introduced the purpose of acquiring only video images, but in addition to this, I felt the urge to acquire voices as well.
Conveniently, IP CAM Viewer Lite has an optional feature that allows you to acquire audio as well, for a fee (about 500 yen, I believe), so I bought it.
However, this does not work at all!
I've never encountered a paid app that didn't do so brilliantly yesterday. I am completely crying myself to sleep.
I will make my own application for this at a later date when I have more time, and report back on the blog.
 Start electronics
