YouTube
Gugen2016
Good evening, this is Bono.
For the first time this year, I entered Gugen, a hardware contest.
I didn’t have much time at all during the production, but I will summarize what I did and some notes for the next one as a reminder.

This year’s contest, the 8th, is one of the largest hardware contests in Japan.
The number of entries has been increasing every year, and last year there were 112 entries.
Made by

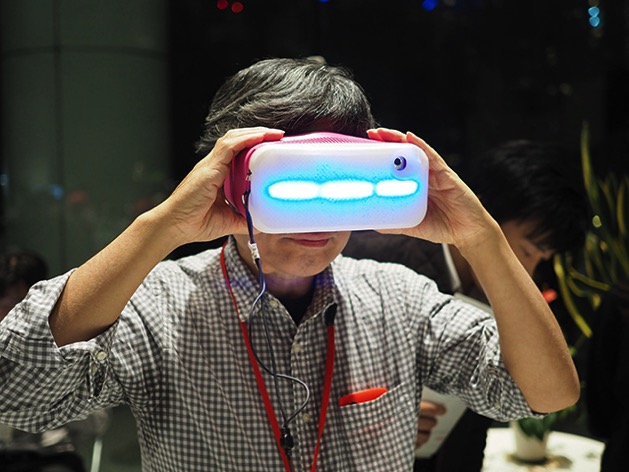
It is an ice-shaped gadget called a cocktail cube.
When placed on a cocktail glass and poured with cocktails, the room glows the color of the cocktail.
Features include
-
Cube has built-in color sensor and Bluetooth module
The color sensor reads the color of the liquid and sends the information to the smartphone via Bluetooth. The smartphone sends the received information to Phillips hue, which can emit light in any color, and glows according to the color read by the color sensor. -
Register your favorite colors and enjoy them anytime!
The cube is connected to the smartphone, so when a favorite color is found, it can be memorized on the app.
Once memorized, the color can be enjoyed again and again simply by touching it from the list. -
Can also be used as ice
A cooling gel is also built into the small space and can be used as regular ice.
motive for manufacturing
-
Anyway, I wanted to create something using Bluetooth.
Everywhere around us, we are now surrounded by electronic devices that use Bluetooth. But even though it is so commonly used, I am not familiar with the principle of operation.
The best way to learn how it works is to work with your hands, so anyway, I decided to make something using Bluetooth next time! I decided to do so. -
Anyway, I wanted to apply to Gugen.
I had known about Gugen for about three years and watched with sparkling eyes as everyone made gadgets that were truly unique and had a strong impact.
Therefore, my desire to someday produce my own products naturally grew.
This year, it finally came to action.
In other words, we wanted to make XXX! The objective was not to make XXX, but to achieve the above two goals anyway.
What we used
- Bluetooth module/BLE nano
- Color sensor/TCS3200
- Coin cell battery/CR2016 * 2 pcs.
- Coin cell battery case
- switch
- Bolts and nuts for fixing color sensor / M3x8 * 4 sets
- 3V to 5V DCDC home-made board (not used in the final product)
- smart phone
- Phillips hue
- Phillips hue bridge
system

The system is fairly simple.
The cocktail cube has a built-in Bluetooth module and color sensor.
The color sensor reads color information (RGB format) and transmits it to a smartphone via Bluetooth.
On the phone, the RGB color information is converted to HSB format, which is then sent to hue, which is in the same WiFi network, and hue glows in that color.
structure

The contents of the cube.
The color sensor is placed on the bottom of the exterior, and light is emitted downward to read the reflected light.
Since it is an ice-type gadget, it naturally has a built-in cooling gel to function as ice. The gel was packed in a case made by a 3D printer.
On top of the gel is a coin cell battery and case for the drive, a Bluetooth module, a switch (not shown in the model), and finally a lid.
To prevent flooding, the contact surface between the lid and the exterior is packed with rubber.
When the lid is closed, the cube is 34 mm square.
creation procedure
plan

We spent quite a bit of time in the conception period, so there were twists and turns.
-
At first I wanted to make goods to help people enjoy whiskey more.
I like whiskey, so at first I thought I would create something related to whiskey. For example, a gyro sensor could be placed in the cup and linked to Phillips hue to create an adult-like effect in which the light shimmers every time the cup is tilted.
We have also seen adult-like gestures of turning ice cubes in a glass by hand, so we thought of giving the ice cubes a controller-like role by attaching a gyro sensor to them as well, so that when they are turned, the lighting color and music would change, etc.
However, this was later abandoned when I looked it up on the Internet, as it was referred to as uncool behavior that should not be done. -
I didn’t like the Kopp hack because it was second best.
At Makuake and CEATEC, I have seen a gadget called “Hikari Masu,” which is a sake drinking gadget with LED and Bluetooth modules built into the Masu to enhance the enjoyment of sake.
Therefore, we decided not to put something in the glass, because it would feel like a second attempt, and because the glass can be of any size (although there is a limit), so we thought it would not be very surprising if we put something in it. -
I still wanted to surprise them.
To surprise them, we still wanted to hack something that had never been done before. With that in mind, we thought that ice, which we had never heard of anywhere else, would be a good choice.
Also, I was already using Phillips hue at home, so I came up with the thought of combining it with the Phillips hue.
At first, we thought it would be interesting if we could express the slightly different coloring of each whiskey, but we gave up on the idea that it would be impossible to distinguish between different whiskeys, so we finally decided to read the color of cocktails.
Parts Selection
-
Bluetooth Module
The key points we focused on were size, cost, and ease of development.
There are Bluetooth modules that are sold individually, some with IO ports, some with USB, etc., and I’m not sure which one I should choose.
The cost is reasonable, and it is also a battle against the fear of failure.
In the end, the following blog was the deciding factor and we settled on BLEnano. It is the size of a 100 yen coin!
My best answer after struggling with BLE module selection
BLE Nano – RedBear -
Color sensor
There were several options here as well.
Any small size would have been fine, but I happened to find a detailed description of how to use the TCS3200 color sensor on the following blog, so I decided on a color sensor to go with it.
The availability of documentation is still the top priority.
Arduino Color Sensing Tutorial – TCS230 TCS3200 Color Sensor – HowToMechatronics
Circuit design/fabrication

After drawing a rough circuit configuration by hand, I created a drawing in Frizing.

It is very useful to have this drawing when soldering, as you will see when you actually do it.
Handwritten drawings are sufficient, but the next step will be easier if you take a little time to draw a neat drawing.
The lower right board in the above drawing is a 3V to 5V boost DCDC board.
The color sensor glows with a white LED, but since the Vf is roughly 3.5V, 3V from a coin cell battery is not enough (although it glows weakly).
When we previously developed a gadget for smartphones called AYATORI, we had fabricated a board to boost 1.5 to 3V to 5V, so we modified and diverted part of this board.
However, as it later turns out, the heat generated by the DCDC IC will be great if used as is lol.
The amount of current flowed was completely different this time because it was necessary to flow several 10 mA, whereas the current flowed by AYATORI was several mA. (The DCDC specification says that up to 100 mA can flow.)
In this case, heat generation is strictly prohibited, especially since it is used as ice!
Therefore, we gave up using DCDC and decided to use two coin cell batteries in series to light the LEDs.
Since this was the first time for both the Bluetooth module and the color sensor, we first checked the operation on a breadboard.

We were most concerned about whether the color sensor could read the color of the liquid. We found out that the color sensor could read the color of the liquid, which was our biggest concern, so we decided to move on.
Exterior design/fabrication
With the contents largely decided, the next step was to design the exterior.

After measuring the dimensions of the contents with a ruler, this was also first imagined by hand.
At first I was thinking of a hexagonal three-dimensional object. Since the design was a bit time-consuming, we decided to first complete it as a cube and then come up with a new design when we had more time.
In the end, we did not have time to do this, so we went with the cube as it was.
The exterior, cooling gel case, and lid were fabricated using a 3D printer.
To create the product, we first modeled the contents in 123D design.

I was entranced looking at this for a while because it turned out beautifully for my first time using this software.
3D modeling is so much fun.
However, I later switched to Fusion360 because it was highly recommended by an instructor at a 3D printer training course. The high standard software that is used in the automotive modeling field is free for individuals! It is free for an individual. There are no functional limitations, as is often the case with free versions.
Also, data can be easily transferred from 123D, so the transfer can be done easily.
Fusion 360 | Free Trial Version | Pricing | Autodesk
In addition, we have made it as small as possible in order to make it as close to real ice as possible. The exterior size is a cube of 34 mm square. This ended up being the size of the substrate of the color sensor.
I really wanted to design/build my own board with kicad for the color sensor as well, and keep it smaller.
The model’s most important feature is the bottom of the exterior.
Color sensors cannot be used in dark areas because they detect color by looking at the light received.
Therefore, the sensor board has an LED to illuminate the light.
It was surprisingly difficult to get LED light into the sensor while preventing liquid flooding.
As a result, we solved the problem by doing the following two things.
* Make the bottom heat as thin as possible: It had to be thin enough to allow the LED light to reach the sensor. We ended up with an ultra-thin 0.4 mm. 0.3 mmm was indeed too thin, and the slit left a gap at the bottom that flooded.
* Eliminate stray light from the LEDs to the sensor: It can be said that the S/N ratio has been improved. Since the system was designed to allow light passing through the outside of the exterior to enter the sensor inside the exterior, light reflected inside the exterior would become noise.
For this reason, a wall was built between the sensor and the LED, and a light-shielding sponge was added there later with adhesive.

I have made several mistakes in coming to this conclusion.

In addition, we searched various places online where we could 3D print.
I was convinced that something absolutely unexpected would arise and it would not be completed in one day, so I looked for a place with a monthly membership rather than renting on a per-unit basis like Fabcafe.
In the end, I decided on a place called Techshop in Tokyo.
The reason was that it was a monthly membership, I found out that I could take a 3D printer training course the same day I called, and the printer was installed with relatively high accuracy.
By the way, the model we have at Techshop is called Afinia H800.
I highly recommend it because it was very easy to use and withstood the 0.4mm design! It costs 380,000 yen sweat when you buy it.
 Afinia H800+ 3D Printer – Afinia 3D Printer
At any rate, the exterior was completed and the contents were put in.

Color sensor-iPhone Bluetooth communication
This was my first time dealing with Bluetooth.
I referred to an article in this area.
In particular, I found Asakusa Giken’s article very informative.
Asakusa Giken: Connecting Arduino and iPhone devices via BLE
Bluetooth communication with iOS apps using BLE Nano (BLE Nano version)|Penta creation
We also read the following books to understand how it works.
O’Reilly Japan – Getting Started with Bluetooth Low Energy
There are many terms used in the book, but I have the impression that if you remember GAT, GATT, service, characteristic, and hopping, you will have no trouble using the book in practice.
We were able to implement bidirectional communication, sending color sensor information from the cube to the iPhone and PWM values for variable LED light intensity from the iPhone to the cube.
At this point, half of the goal has been achieved!
However, I am still far from being able to use it, as I don’t know how to send more than 2 bytes of information. I would like to play around with it again when I have more time.
Application Creation
Next, we now connected the phone to HUE.
However, Phillips has released an SDK for this, so we used that in its entirety.
Getting started | Philips Hue API
The mechanics of the bridge are too complex for me to understand at all.
However, it was usable, so no problem! It’s a good thing.
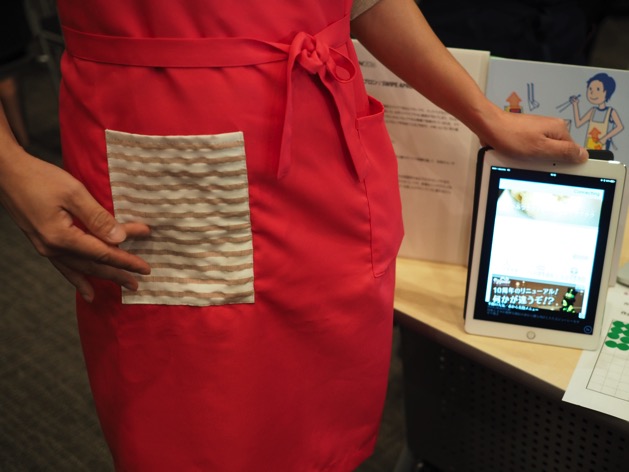
The application design has a transparent background cocktail on top, and the background color is changed according to the color acquired by the color sensor.


We have also added a feature that allows you to name and register your favorite colors once you find them.
Once registered, you can create your own color list as shown below and choose your favorite colors to illuminate.

Logo/demo movie creation
The logo was created in Illustrator and the movie in After Effects.
The logo material was found by searching for cocktails at Adobe Stock, which I took advantage of because Adobe Stock offers a one-month free trial period.
There is a wide variety of good quality material, usually at a good price! I was convinced that this is indeed what you pay for.
I found a photo of a cocktail glass with a glow on it that looked good, so I decided to use it as a reference for the logo.
As for movies, I have been completely captivated by After Effects ever since I used it to make a movie for a friend’s wedding, so I used it again this time.
AE is not very easy to operate, and I especially recommend two screens! If you occupy one screen with the timeline and the other with the preview and control panel screen, you can make great progress.
I really wanted to take pictures of the fun at the bar, but I didn’t have the time, connections, or equipment to do so.
After much thought, we decided to use illustrations and animations to show how to use and enjoy the product.
We thought that since the functions are simple, it would be better to keep the information as small as possible to stimulate the imagination of the people who are looking at it.
For some of the parts that show how the product actually works, I secretly filmed them at the dining table at home while the family was sleeping.

We also wanted to add the actual change in sensor values to the scene where the colored liquid was being poured, so we used Processing to visualize the acquired data in a graph.
After all, to appeal visually, Processing, OpenFrameworks, etc. are essential.

posting (e.g. to a newsgroup or mailing list)
It was very difficult to make it in time, but it was finally completed three days before the deadline! It was very difficult to make it in time, but three days before the deadline, it was finally completed!
I was very nervous, but I filled out the application form on Gugen and applied for the program.
However, no matter how long I waited, it did not appear on the Gugen website, and I was quite impatient.
Finally, the day before the deadline, we confirmed that it had been published and we announced it to everyone on Twitter and Facebook.
With this, we have finally achieved our final goal.
Thoughts on Submission
After all, the presence of a designer is a must.
I’d love to have it! I’ve seen a number of posts and I’m enthralled by the perfection of the design.
I love making logos and movies, but they tend to be just a single use of effects and materials, and I can’t shake the amateurishness of them.
Looking at the submissions, the most popular tended to be products that had a high level of design perfection and successfully found people’s hidden issues.
Next time, I hope to put a little more emphasis on design or take on the challenge with a designer partner.
It is important to communicate at a glance
This time, I think I made a bit of a mistake, and this is what I think happened.
When I posted the article, I used only the title “Cocktail Cubes” and the eye-catching image was just a picture of a cube on a glass.
This makes it impossible to figure out what it is at a glance.
You can only understand what it is by accessing the page and, in some cases, watching the movie.
For this reason, there is a high probability that even if you apply, you will not be passed over by people who are on their way to work or busy.
In this case, they should have at least added one word to the title, “Mysterious ice that colors the space.
I regretted it later because I wanted to reach as many people as possible.
After all, making things is fun!
Many of the items were new to me, such as Fusion360 and 3D printers.
In the process, I had many opportunities to experience intellectual excitement, such as new discoveries and struggles, gradually learning tools and realizing that I could master them, and talking with various people in the Techshop where the 3D printers were located.
We often worked late into the night, but I was rather excited and could not sleep.
I realized once again that I am making things in order to experience this feeling.
Next, I would like to work hard for next year’s MakerFaire.
\電子工作歴9年の私のイチ押し!ELEGOOの電子工作キット/