
Applications for the Yahoo Creative Award closed at 1:00 p.m. on August 13. As I mentioned in my 7/5 diary, I also attended the MeetUp event, and the two of us have been planning it all along, along with the designer I met there.
However, as a result, it was not completed in time at all with a completion rate of about 60%. It is meaningless if the deadline is on the first day of the summer vacation. I wish I had at least one more week. So, since it would be a waste of my time and I am not satisfied with the situation as it is, I would like to at least write the secret story of the creation so far in this blog.
About Yahoo Creative Award
An annual contest to collect creative works on some theme and award them.
There are individual and corporate categories. There are a number of themes, whether it is a new way to use a smartphone or an advertisement promoting Yahoo’s services. For more information, visit http://creative-award.yahoo.co.jp/
plan
The theme of this year’s event focused on the need to promote Yahoo! as a “problem-solving engine.
The reason for this is that it is a new issue added this year, and I got the impression that “we want to be a problem-solving engine,” which is what Yahoo wants to push in the future. Although listed as one of the themes, I think this is actually what Yahoo wants to create the most. Inevitably, the probability of receiving an award should be high. This was the basis for the decision.
So, first of all, I brainstormed alone. I spent a whole day off to come up with ideas on the whiteboard at home. 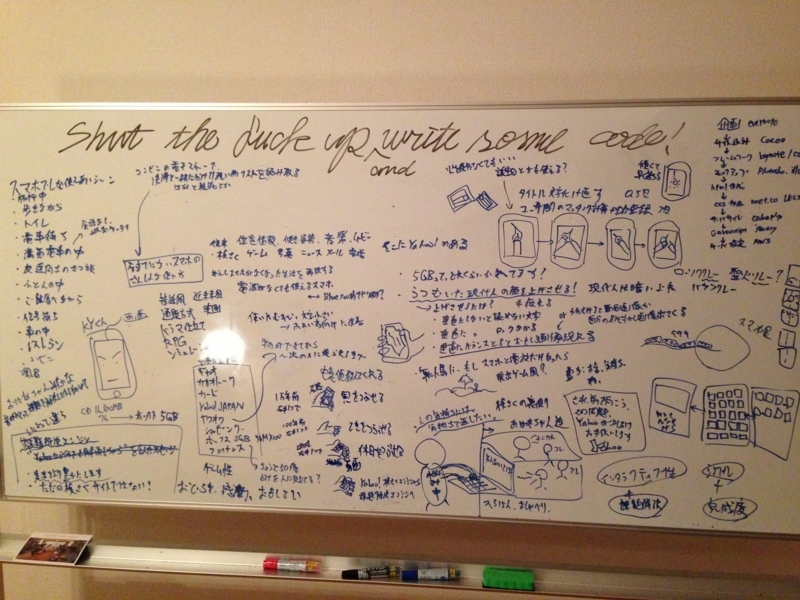
collection of ideas
Here are some of the ideas that came up.
- Let’s make a toast to that guy in the distance: Friends who live far away from each other can make a toast to the other person by using their smartphone as a beer.
- Evolution of right-hand tools: Hold the smartphone in your right hand, and first a stone (assuming 10,000 years ago), then a gun (assuming 100 years ago), and finally the Yahoo top screen (assuming the present) appears, and the message “Your problem can now be solved with one right hand” appears.
- Absolute Safety Candles: Displays realistic-looking candles on the smartphone screen, which can then be used to play with pseudo candles. Birthday cake celebrations, candle relays, etc. What used to be dangerous and avoided in the house can now be played in any place and at any age with this service!
- Services to look forward to: see below
- Grandma in your phone: The setting is that a little grandma lives in your phone, and the words you search for will respond to the results consulted by these grandmas.
In the end, we chose a service that allowed us to look forward
I was walking down the street one day and suddenly noticed something. I was walking down the street one day, and I noticed that everyone was looking down. And in their hands, yes, their phones.
When I look at them quickly, they all seem to be depressed and distressed, which somehow makes me feel gloomy. This is what I myself had been feeling somewhat uncomfortable about. Thanks to the fact that smartphones have become too much fun, people now have less time to look forward. Of course, most people are probably not looking down because they are worried.
However, I think it is a human trait that if you keep looking down, your feelings will also go in the wrong direction. At least, that’s how I feel. I thought this would be a great disservice to society, and I wanted to create a work that would make people look forward, even if only for a moment, and emphasize the importance of looking forward. That is why I decided on this concept.
Brainstorm with members and decide on the content.
When I told Mr. Inose, a designer I met at a recent meetup event, about this idea, he said, “That’s a good idea! He said, “That’s a good idea! I started listing ideas on Google Drive on how to turn this concept into a work of art. Within a week, we had about 30 ideas. We had a Skype meeting and decided to use the image of rain dripping down. Here are the specifications.
- Use of TOP page of Yahoo!
- When you open the screen, it rains (in a rainy mood style).
- “Rain is as realistic as if it were actually falling on the iphone.
- If it’s horizontal, it’s like rain dripping down, if it’s tilted, it’s like dripping down (following gravity).”
- More rainfall when horizontal → less as you go vertical → sunny when vertical
- Faithfully reproduces the sound of rain (actual rain sound recorded)
- “Movement when vertical — after about 3 seconds of being vertical, it rains ** →clear and whiteout ** →”Don’t worry about looking down, look forward” ** →”Yahoo! will help you with that worry a little” ** →Yahoo!JAPAN logo” Now 7/23, 20 days left.
making
Now that the concept has been decided, we can begin to create it.
Various mock-up creation
I was the first to create a service using the gyro sensor of a smartphone, so I’ll play around with it briefly. I found an Elmo image for “flapper manga” on the web, so I tried to make an application that uses it to make the manga move according to the angle. Elmo flapparapparamanga Completed this test I didn’t know that it is possible to get the information of acceleration sensor by javascript, so it was a very good learning experience for me. However, if the information from the sensor was simply acquired as is, the cartoon would move in wiggles due to blurring, noise, etc., and it was unpleasant to watch. Therefore, we devised a new method to perform the averaging process.
There are many ways to do this, but here we simply averaged the last 10 sensor values and used that information to determine the angle. I would like to add a threshold, but that’s about it for now. The code is like this. Sorry for the amateur program.
 $(function(){
            var msg = 0;
            var ptz = 0;
            var tz,tz1,tz2,tz3,tz4,tz5,tz6,tz7,tz8,tz9;
            var i = 0; //チャタ取り用
            window.addEventListener("devicemotion",function(evt){
                var x = evt.accelerationIncludingGravity.x; //横方向の傾斜
                var y = evt.accelerationIncludingGravity.y; //縦方法の傾斜
                var z = evt.accelerationIncludingGravity.z; //上下方向の傾斜
                //水平を0、垂直を256とする
                var pz = (z / 10 * 256) + 256;
                //整数に変換しないと読み込んでくれない
                tz = Math.round(pz);

                //チャタ取り。tz1新しい⇄tz4古い
                //平均化
                var ave_tz = (tz+tz1+tz2+tz3+tz4+tz5+tz6+tz7+tz8+tz9) / 10;
                tz9 = tz8;
                tz8 = tz7;
                tz7 = tz6;
                tz6 = tz5;
                tz5 = tz4;
                tz4 = tz3;
                tz3 = tz2;
                tz2 = tz1;
                tz1 = tz;
                //エルモ画像
                var preImgNum = ave_tz / 4;
                var imgNum = Math.round(preImgNum);
                if (imgNum <= 62 ){
                        $("#elmo").attr("src","img/images/elmo-"+imgNum+".jpg");
                }else if(i>=5){
                        $("#elmo").attr("src","img/images/elmo-62.jpg");
                }
                //加速度センサの情報を表示
                $("#test").html("x:"+x+"<br>y:"+y+"<br>z:"+z+"<br>tz:"+tz);
                //数字と文字を変化させる
                if( z < 2 && z > -2 ) {
                        if( msg == 0 ) {
                                $("<h1>さぁ、前を向こう</h1><img src='img/images.jpeg'/>").appendTo("#result").hide().fadeIn(1000);
                                msg = 1;
                        }else{
                                msg = msg;
                        }
                }else{
                        $("#result h1").remove();
                        $("#result img").remove();
                        msg = 0;
                }
                ptz = tz
            },false);
                sleep(100);
        });
I also made another test one. It changes brightness depending on the angle, and when it stands up to vertical, a message is displayed. This one is pretty good too. Currently 7/28.
I’m struggling to be realistic.
What I want to push this time is a message and, above all, reality. When you look at your phone as usual, it should be sunny, but rain is dripping down. There is also the sound of rain. I think it’s strange, so I raise my phone and see that the rain has stopped and the message is over there in front of me. In order to do this, it is essential to have a reality to make it seem real. As an image, [http://www.rainymood.com/:title=Rainy Mood] is quite close. It just plays scenes of rain, but it’s a pretty cool site, so check it out if you don’t know about it. Mr. Inose agrees with me in wanting to pursue reality, and at first we talked about actually making it rain on a smartphone and playing it on a movie. Since Mr. Inose’s connections allowed us to rent a studio, we decided to give it a go. However, it seemed to be quite a challenge to take the picture, so I gave up. I myself decided to use Creative JS because I wanted to use javascript to improve my skills. The Yahoo mentor I met at the hackathon also recommended it.
Struggle with Cretive JS
However, this was quite a hurdle for me, who had never used javascript properly. Since I haven’t mastered the object-oriented concept, I tried with a reference book in hand.
This book is quite easy to understand, and as it is titled “For Web Creators,” it starts with the basics of javascript and even describes how to install and introduce CreativeJS. At this point in time, I don’t think there is a book that focuses so much on CreativeJS.
Here is the code I wrote. As per the rule, we first create a canvas element in html.
<body onload="initialize()">
<canvas id="myCanvas" width=600 height=900></canvas>
Next, load the CreativeJS libraries. Each one plays a different role. Don’t be intimidated by the number of libraries.
<script src="easeljs/utils/UID.js"></script>
<script src="easeljs/geom/Matrix2D.js"></script>
<script src="easeljs/geom/Point.js"></script>
<script src="easeljs/events/EventDispatcher.js"></script>
<script src="easeljs/utils/Ticker.js"></script>
<script src="easeljs/events/MouseEvent.js"></script>
<script src="easeljs/display/DisplayObject.js"></script>
<script src="easeljs/display/Container.js"></script>
<script src="easeljs/display/Stage.js"></script>
<script src="easeljs/display/Bitmap.js"></script>
<script src="easeljs/display/Graphics.js"></script>
<script src="easeljs/display/Shape.js"></script>
<script src="easeljs/display/Shadow.js"></script>
<script src="easeljs/filters/Filter.js"></script>
<script src="easeljs/filters/BoxBlurFilter.js"></script>
<script src="easeljs/filters/ColorMatrixFilter.js"></script>
<script src="easeljs/filters/ColorMatrix.js"></script>
<script src="preloadjs/AbstractLoader.js"></script>
<script src="preloadjs/LoadQueue.js"></script>
<script src="preloadjs/TagLoader.js"></script>
<script src="preloadjs/XHRLoader.js"></script>
<script src="tweenjs/Tween.js"></script>
<script src="tweenjs/Ease.js"></script>
Here is what I actually wrote. The first step is to load the image into the canvas.
function initialize(){
    //傾きアクション
    //canvasを用意
    var canvasElement = document.getElementById("myCanvas");
    stage = new Stage(canvasElement);
    //preloadjs起動
    var loader = new LoadQueue(false);
    //イベントリスナー関数。fileloadが完了したら、drawイベントを実行する。drawには()を付けない事!ここでは登録するだけなので
    loader.addEventListener("fileload",draw);
    //tweenする方(雨)は後で呼び出す
    loader.addEventListener("fileload",tweentest);
    //表示の基準点を補正
    loader.center = new Point(canvasElement.width / 2, canvasElement.height /2);
    //YahooTopを読み出す
    loader.loadFile({src:file});
}
The rest is long, so I will omit it, but to give an overview, the flow is as follows: image loading is complete → call the draw function → create multiple circles (rain) with the createShape function → determine if they are correct, and if so, call the combinedShape function to combine them. So far, the rain is clear of any signs of connection.
Mastering Bezier Curves
The hardest part of the code so far is definitely where the rain connects. I tried to draw the rain with Bezier curves because I wanted to create a more realistic shape than just a circle, and another reason was that I decided it would be easier to write a program to join them. If you create rain with circles, it is impossible (at least with my knowledge) to write a program that shows what the shape will look like when they are joined together. On the other hand, Bezier curves are simply a set of start and end vectors, so no matter how many points there are or how they are connected, there is nothing that cannot be expressed using Bezier curves. Of course, in pursuit of realism, it is necessary to take into account things like the surface tension of rain, but that is a topic for the next step. For now, the Bezier curve is the only and best solution for making and connecting rain. However, I am still an amateur at Bezier curves. I studied at [http://jsdoc.hotcom-web.com/wordpress/archives/168:title=html5 framework tutorial]. Of all the sites, this was the most clearly explained in terms of coordinates. Based on this site and the coordinates of the circle created with Bezier curves in Photoshop, the circle is drawn using CreativeJS and Canvas. Once you learn it, it’s nothing. It is just the magnitude and orientation of the start and end vectors in coordinates.
Here is the code I created, where var bpt is the content of the Bezier curve. This time, I wanted to represent rain with three anchor points, so it contains two starting point coordinates and six coordinate information for each of the three anchors. If you don’t understand, let’s make a circle with the pen tool in photoshop.
In order to change the shape of the rain, the scale can be used to change the overall size, and the size can be used to change the size in the xy-direction. In the future, we plan to provide several types of rotation and coordinate axes. The current date is 8/2, with 10 days to go.
function createShape(nX, nY, custom, numX, numY){
    var myShape = new Shape();
    myGraphics = myShape.graphics;
    setAppearance(myShape, nX, nY);
    myGraphics.beginStroke(Graphics.getRGB(255,255,255));
    var bpt = [10, 71.5,    51, -48.5, 203.5, 5, 225.5, 73.5,       245.5, 132, 167.5, 219.5, 92.5, 200.5,     26.5, 185, -19.5, 163, 10, 71.5];
    myShape.bpt = bpt;
    //ベジェ曲線で雨を描く
    if (custom == "size") {
        myGraphics.moveTo(bpt[0]+numX,bpt[1]+numY).bezierCurveTo(bpt[2]+numX,bpt[3]+numY,bpt[4]+numX,bpt[5]+numY,bpt[6]+numX,bpt[7]+numY).bezierCurveTo(bpt[8]+numX,bpt[9]+numY,bpt[10]+numX,bpt[11]+numY,bpt[12]+numX,bpt[13]+numY).bezierCurveTo(bpt[14]+numX,bpt[15]+numY,bpt[16]+numX,bpt[17]+numY,bpt[18]+numX,bpt[19]+numY).endStroke();
    }else if(custom == "scale") {
     myGraphics.moveTo(bpt[0]*numX,bpt[1]*numY).bezierCurveTo(bpt[2]*numX,bpt[3]*numY,bpt[4]*numX,bpt[5]*numY,bpt[6]*numX,bpt[7]*numY).bezierCurveTo(bpt[8]*numX,bpt[9]*numY,bpt[10]*numX,bpt[11]*numY,bpt[12]*numX,bpt[13]*numY).bezierCurveTo(bpt[14]*numX,bpt[15]*numY,bpt[16]*numX,bpt[17]*numY,bpt[18]*numX,bpt[19]*numY).endStroke();
    }
    //シャドウは一つしか付けれなさそう
    myShape.shadow = new Shadow("#000000", 0, 7, 3);
    return myShape;
}
Technical barriers
Up to this point, things had gone somewhat smoothly, but the implementation of this coupling was quite formidable. Rather, as it turns out, we took too many turns on this process and did not make it in time. As a point of reference, we were stumped by the following points. – Selection of anchor points to be joined – Programs according to how they are joined (angles) – Array operations (referencing)
Unfinished Business
I wish I could have done the rest around here. I have 10 days left as a total turnover! Not enough at all. – Move the rain using TweenJS (depending on the angle of the phone) – Use SoundJS to play the sound of the rain – Messages and tricks for vertical – Speed up loading (currently takes about 20 seconds) And this is where the work is at the moment. And here’s what I’ve got so far. In case you are wondering, the rain changes every time you load it. [http://storyauc.com/test9.php:title=作品]
Finally.
Although I was not able to make it in time this time, there were people who shared the concept I proposed, and I was able to get a sense of the quality of this work through a small demo. Technically, I was able to learn about CreativeJS, object orientation, the concept of references, and how to create Bezier curves. I felt again that the best teaching material is to have a strong desire to “make this” yourself. I’d like to continue to cobble together a continuation, although this time it’s overdue in the middle of the project. I would like to submit in other contests if the opportunity arises. Still, I thought that expressing realism is a difficult but very interesting and very rewarding task. Thanks for your hard work, Mr. Inose.
\電子工作歴9年の私のイチ押し!ELEGOOの電子工作キット/
